Friday, December 27, 2013

Slow Cooker Salsa Chicken


I originally found this dish at Skinnytaste, but have made some adjustments to fit me. Each time I take a bite of this dish for the first time, I think how good it tastes for the little amount of effort that went into it. This makes me happy.

Salsa chicken can be eaten in so many versatile ways. My favorite is in a burrito bowl with a little rice, shredded cheese, sour cream, and pickled jalapenos. I would like to try it in a salad this summer when the farm stand veggies come back into season, too. My husband prefers it as a burrito. I have also just eaten plain with a touch of salsa. It is salsa chicken, after all. 

Some of the adjustments to the original recipe is the cooking time and the spices. The original called for the chicken to be cooked for four hours. I find that my crock pot dries meat out when it is in there for that long. I have adjusted my total cook time to three and a half hours for this reason.


We also do a lot of Latino cooking in my household, so I have a ton of spices to use. I added cayenne for heat, which can be easily adjusted up or down depending on preference. Then I added oregano and extra cumin to crank up the depth. In the future, I am thinking I will add some chipotle peppers and liquid smoke to make a smokier version... with cheddar cheese. Yes. 

Salsa Chicken Recipe

Ingredients

4 chicken breasts
1 cup and 2 Tbsp. salsa, divided
2 Tbsp. cayene (if you don’t like spicy, I suggest 1 tsp.)
1 Tbsp. garlic salt
1 Tbsp. oregano
1 tsp. cumin
Ground black pepper to taste
1 15 oz. can Black Beans, rinsed and drained

Directions

1. Place the chicken breasts in the slow cooker. Add 1 cup of salsa, cayenne, garlic salt, oregano, cumin, and black pepper. Cook the chicken on low for three hours (see note about cooking time above).


2. Take the chicken out and set aside. Measure 1 cup of the salsa broth from the pot and set aside. Drain the crock pot basin.


3. Add the black beans and the reserved salsa broth and extra salsa back to the crock pot. Set it on warm. 

4. Shred the chicken with a fork. Add it back to the crock pot and stir the ingredients. Leave it in the crock pot to warm for half an hour.

Serve either by itself, as a burrito, as a burrito bowl, or in a salad. Enjoy!


Friday, October 11, 2013

Harvest Mashed Potatoes

I have become addicted to buying produce at the Pole Green Produce Market down the street from me. One of the reasons is that they have had the tastiest fingerling potatoes. I have been roasting them, boiling them, and sautéing them. They have been side dishes and main dishes. Tonight it was a side dish that became the main dish.


I am a huge fan of Pinterest. Back in April, I pinned a recipe from Southern Living, called Harvest Mashed Potatoes. I had been dying to make these and wanted to wait until the fall, because tasty mashed potatoes belong in cooler weather. Summer mashed potatoes just does not do well with me. 

Being a Friday night, my husband and I were too tired to do anything crazy and cumbersome. There was a pork loin defrosted and a jar to Stubb’s to marinade with. I scavenged Pinterest and remembered my harvest potato recipe. We made a few adjustments to the original recipe to use ingredients we had left over and were quite pleased with the outcome. The dish was so tasty that we ate more of the potatoes than the pork loin.


When I first read the recipe, I was skeptical about using horseradish. Butter, milk, potatoes, cinnamon… and horseradish? After tasting the earnest goodness of the cinnamon and the potatoes, I discovered that the horseradish was needed to break up the overwhelming monotony of the sweetness. The spicy pinch gave the dish a little extra kick that allowed the cinnamon to shine even more as it overcame the complexity.

I highly recommend making this dish in either the recipe I created below or the Southern Living recipe linked above. It embodies the full aromatic flavors of fall and makes me feel like the leaves are turning.

Harvest Mashed Potatoes Recipe
Serves 6

Ingredients
18 fingerling potoates, or 2 pounds
2 medium sweet potatoes
¼ cup butter
½ cup half and half
¼ cup sour cream
¼ heaping cup of Parmesan cheese
1 tablespoon prepared horseradish
¼ teaspoon salt
¼ teaspoon pepper
¼ teaspoon cinnamon
1/8 teaspoon pumpkin pie spice

Method

1. Peel the sweet potatoes and cut into 1 inch pieces. Wash the fingerlings and quarter. Boil them in salted water for 15 to 20 minutes or under tender. Drain them and place in a large bowl.

2. Add the butter, half and half, sour cream, cheese, horseradish, salt, pepper, cinnamon and pumpkin pie spice. Blend the ingredients with a hand mixer until smooth. 


Tuesday, October 8, 2013

Cilantro Turkey Burger

One of the best things I have done for myself is begin taking photography classes through Flying Photo School. I found a Groupon for them and originally decided to try it on a whim. I have officially completed their Digital 101 and 102 courses.


A few years ago, my husband bought me a decent camera. Before, I was using disposable snap and shoots. Horrific, right? So, once I had a nice camera, I realized that the nice camera doesn’t just take wonderful shots all by itself. I actually had to learn all of the settings. For example, I would play around and mess up a bar that went from, -2 to +2 and have no idea what I did. Then, all the pictures turned out horrible. I became scared of the camera.

When trying to fix it, I pushed buttons like manual focus or changed the settings to “P” or “TV” and didn’t see a difference. I thought TV actually meant it was a video setting. Crazy. 
The long story made short, was that Flying Photo School was an easy way for me to learn the basics of my camera. With the recipe pictures below, hopefully you can see the difference.

If you are interested in checking them out, visit their website at: 


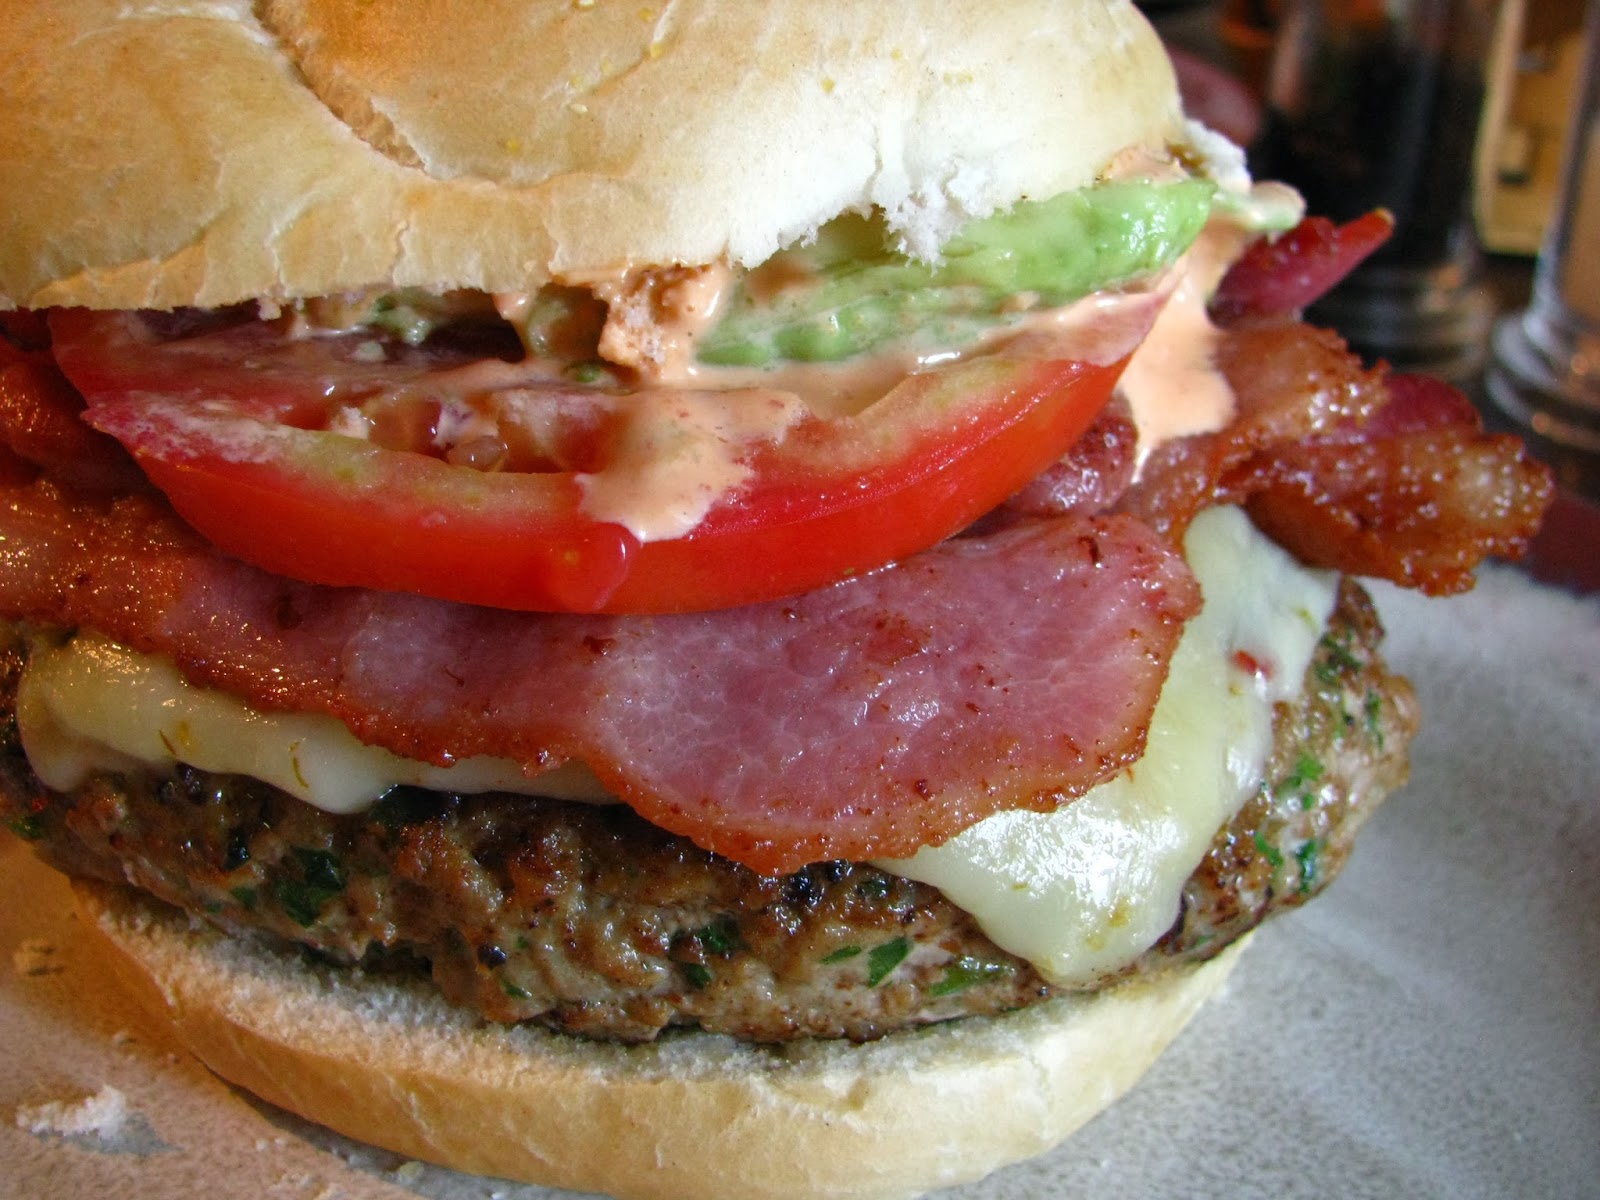
Now, on to the burger. I made a turkey burger. This was not just any old turkey burger. It was a touch of deliciousness, a glorified tribute to making something healthy and turning it back to being not too healthy again.


Once again, my style for this is flexible. You can add toppings on your own, or subtract others. We used this recipe for three servings, one manly half pound burger, and two smaller quarter pounders for me at different meals. The servings below are proportioned for four quarter pound hamburgers.


Cilantro Turkey Burger Recipe
Serves 4 half pound burgers

Ingredients
12 slices bacon
1 lb ground turkey
1 ½ cup cilantro, chopped
8 slices pepper jack cheese
1/4 cup mayonnaise
Sriracha, to taste (we used 2 Tbsp.)
Juice of ½ lime
4 hamburger buns
1 large tomato, sliced
1 large avocado, sliced

Suggested Equipment:
Large Skillet
Broiler Pan or Flat Sheet Pan

Directions
1. Heat a skillet to high and cook bacon to desired crispness. When finished, place the bacon on a plate with paper towels but do not discard the bacon grease from the skillet. Set it aside.

2. Mix the turkey and cilantro in a large bowl. Pat out four equal sized burger patties. We roll it into a ball, then press down with hand cupped to keep edges together in a circle. Cook the burgers in the skillet with bacon grease on high heat until cooked through.

3. Heat broiler at standard heat, at 500 degrees Fahrenheit. Place the burgers on the broiler pan and place two slices of pepper jack cheese on top of each. When heat has been reached, put the burgers on top rack and broil until the cheese has melted.

4. Mix the mayonnaise, Sriracha, and lime juice together to form a spicy sauce. 

5. Place the burgers with melted cheese on the bottom hamburger bun. Add three slices of bacon on top of the cheese of each burger. Then divide the tomato and avocado equally to each, placing the tomato and avocado on top of bacon. Drizzle the mayonnaise sauce on top of the stack and finish it with the top bun. Enjoy the masterpiece!


Friday, September 27, 2013

Apple Sausage with Roasted Maple Sweet Potatoes and Carrots

Autumn, my favorite season, is finally here. I love the crisp temperatures cooling down and the leaves turning vibrant shades of yellow, red, and orange. Most of all, the local farm stand has baskets filled with no-wax apples and giant sweet potatoes. I purchased a large amount of both items and decided to make a lunch dish for the work week.

When making for something to take to work, I would like it to last at least three to four days. Plus, it is beneficial for it to be easy because I am usually making it on a school night when I have to get up early to teach the next day. Easy meals with little or no fuss are the best. 

In addition to ease, I also need it to be healthy. I have been trying a whole “eat to live” approach this year, as opposed to “living to eat.” I still love to eat, please don’t misunderstand, I am just learning to love eating healthy. This is a relatively new idea for me, after thirty years of eating a diet that increased my waistline. Embracing fresh organic produce has filled me with energy, motivation, and happiness. 


This particular dish was both sweet and savory. I loved the blend of the sausage combined with the apple and sweet potatoes. I also added some dill and onion to break up the sweetness of the other ingredients. Then, the maple syrup tied all of the components together. It was hearty treat. 

When I began to type this recipe out, I realized that it seems a little long. The steps are short, and there is a lot of down time because the ingredients are roasting. The most cumbersome aspect of the dish is all of the chopping. Once that is completed, it’s a piece of cake!

Apple Sausage with Roasted Maple Sweet Potatoes and Carrots Recipe
Serves 4

Ingredients
2 medium sweet potatoes, sliced into ¼ inch rounds
4 carrots, halved and sliced
1 yellow or white onion, quartered 
2 Tbsp fresh dill, chopped
1 Tbsp Olive Oil, plus more to drizzle
3 medium apples, sliced 
4 Chicken Apple Sausage Links (Aidell’s is my favorite)
2 Tbsp Pure Maple Syrup

Method
1. Preheat the oven to 400 degrees Fahrenheit. 

2. Mix the potatoes, carrots, onion, and dill together in a bowl. Add the olive oil and toss the ingredients to fully coat them.

3.  Layer the oil coated vegetables on a baking sheet in a single layer. Roast the vegetables in the heated oven for 20 minutes. 


4. While the potatoes, carrots, and onions are baking, slice the apples and place them in the same bowl that contained the vegetable mixture. Swirl the apples around to lightly coat them in oil and dill. Add more if needed.

5. After the vegetables have baked for 20 minutes, add the apples to the pan. Continue baking in the oven for an additional 15-20 minutes, or until the potatoes and carrots are tender.


6. While the apples and vegetables are baking, place the sausages in a skillet. Fill the skillet with water until sausages are at least half way covered. Boil the sausages for ten minutes. 

7. When sausages have finished, drain the water from the pan and allow sausages to cool. Slice the sausages into half inch rounds. Place sausage rounds into serving bowl.

8. When vegetables and apples have finished baking, allow to cool for five minutes. Then, add mixture to the bowl with the sausage. 

9. Drizzle maple syrup over the mixture and stir. 


Monday, September 16, 2013

Irish Nacho Hash


This evening, I came home exhausted, but had an insatiable need to sink my teeth into hearty meal. I had been at work teaching my delightful sixth graders all day, and then went directly to the gym and pushed myself on the elliptical for forty five minutes. I walked in the door to an empty house with my husband still at work and then going to Jiu Jitsu practice. After showering, I realized I was out of yogurt for the morning and went back to the store. I was aggravated. I was tired. I was hungry.

After stacking my yogurts in the fridge, I looked around to see what I had. I was pleased to see half of a large Kirkland ham steak, some cubanelle peppers, and a jalapeno. I knew there were potatoes in my basked, so the first thing that came to mind was a hash. I had some scallions and onions, too. I chose the scallions because they would perish sooner. I was a little weary about the taste because I had never had scallions in hash, but it worked out just fine. 

I knew the potatoes would take the longest, so I boiled them first. Meanwhile, I chopped the other ingredients and began to heat them on the skillet. I left the heat low, for a slow meld of salty ham and spicy jalapeno heat to sink the ingredients. When the potatoes were done, I added them to the skillet, and then they had a chance to absorb the fresh flavors.

While I was heating the ingredients in the skillet, I realized that the scallions and potatoes reminded me of Irish Nachos, or nachos made on top of potatoes instead of tortilla chips. It was then that I decided to add cheese to the concoction, putting the nacho into the hash. When I put the cheese on top right after plating it, the steam from the heating process melted the cheese sufficiently. I did have an idea to add more cheese and place it under the broiler, but I was too tired for the further step.

This meal is straight up filling. I plated mine out, a little less than half, and it was too much. I had to give my husband a little off of my bowl, and then he couldn’t finish his. It was super tasty, with cheesy coated potatoes, salty ham, and peppery heat. I could eat it all over again… when I can fit it. 

When I make this again, I will add sour cream and some diced tomatoes… I dare you to try it, too. 

Ingredients
1 dozen fingerling potatoes, quartered
1 tsp. Olive Oil
8 oz ham steak, diced
2 cubanelle peppers, diced
1 jalapeno pepper, diced
2 scallions, thinly sliced
Pepper to taste
Salt to taste
½ cup shredded cheese (or more to taste!)

Method
1. Boil the quartered potatoes in a large pot of water for twenty minutes, or until the potatoes are soft.

2. Warm the olive oil in the skillet until temperature is medium low. Add the ham steak, cubanelle peppers, jalapeno, scallions, pepper, and salt and cook until the peppers are soft.

3. Add the potatoes to the skillet. Heat until flavors have united, roughly three minutes.

4. Plate the hash and immediately add the shredded cheese. Mix the cheese gently and let it melt as the steam rises. Let stand for five minutes. Then, eat it. 

Sunday, September 8, 2013

Ginger Red

Style: Chinese
My Rating: 4.5/5

Website: http://gingerred.com/

Likes: Large portion sizes, very friendly staff and willing to recommend items, pleasant decor

Dislikes: The building is hard to find behind another strip mall

I love good Chinese food. When there is a plate full of meat that is thickly tossed in a sweet and spicy sauce surrounded by crisp vegetables and rice, I am all in. That is exactly what we had at Ginger Red.

This is the first restaurant I have reviewed since we moved to Mechanicsville, VA. We have not been eating out as much because I am trying to eat healthier and we are saving up to buy something to decorate the walls in our very bare apartment. However, every once in a while, there is a need to splurge!

Walking in, we were greeted very quickly with bright smiles and bright red walls. The restaurant was very crisp and clean and we were seated in a corner with lots of windows with sunlight streaming in. There were blinds, but they were not needed.

Our server was one of the nicest wait staff we have ever had. She was sweet with a gentle innocence and eagerness to help out. When we told her we were new to the area, she told us about some of the specials they have on different days of the week. Wednesdays are half of sushi! This makes me excited for future visits. 

Brad ordered the classic Happy Family dish. This was presented with so much fun and flare! It came out on a sizzling skillet and was plated on a cast iron plate in front of us. The vegetables, including the snap peas and baby corn, were crispy and flavorful. Brad was excited because the dish was cheaper than most Chinese restaurants, even cheaper than “the cheap take out places.” The portion size was also larger than the cheaper places.


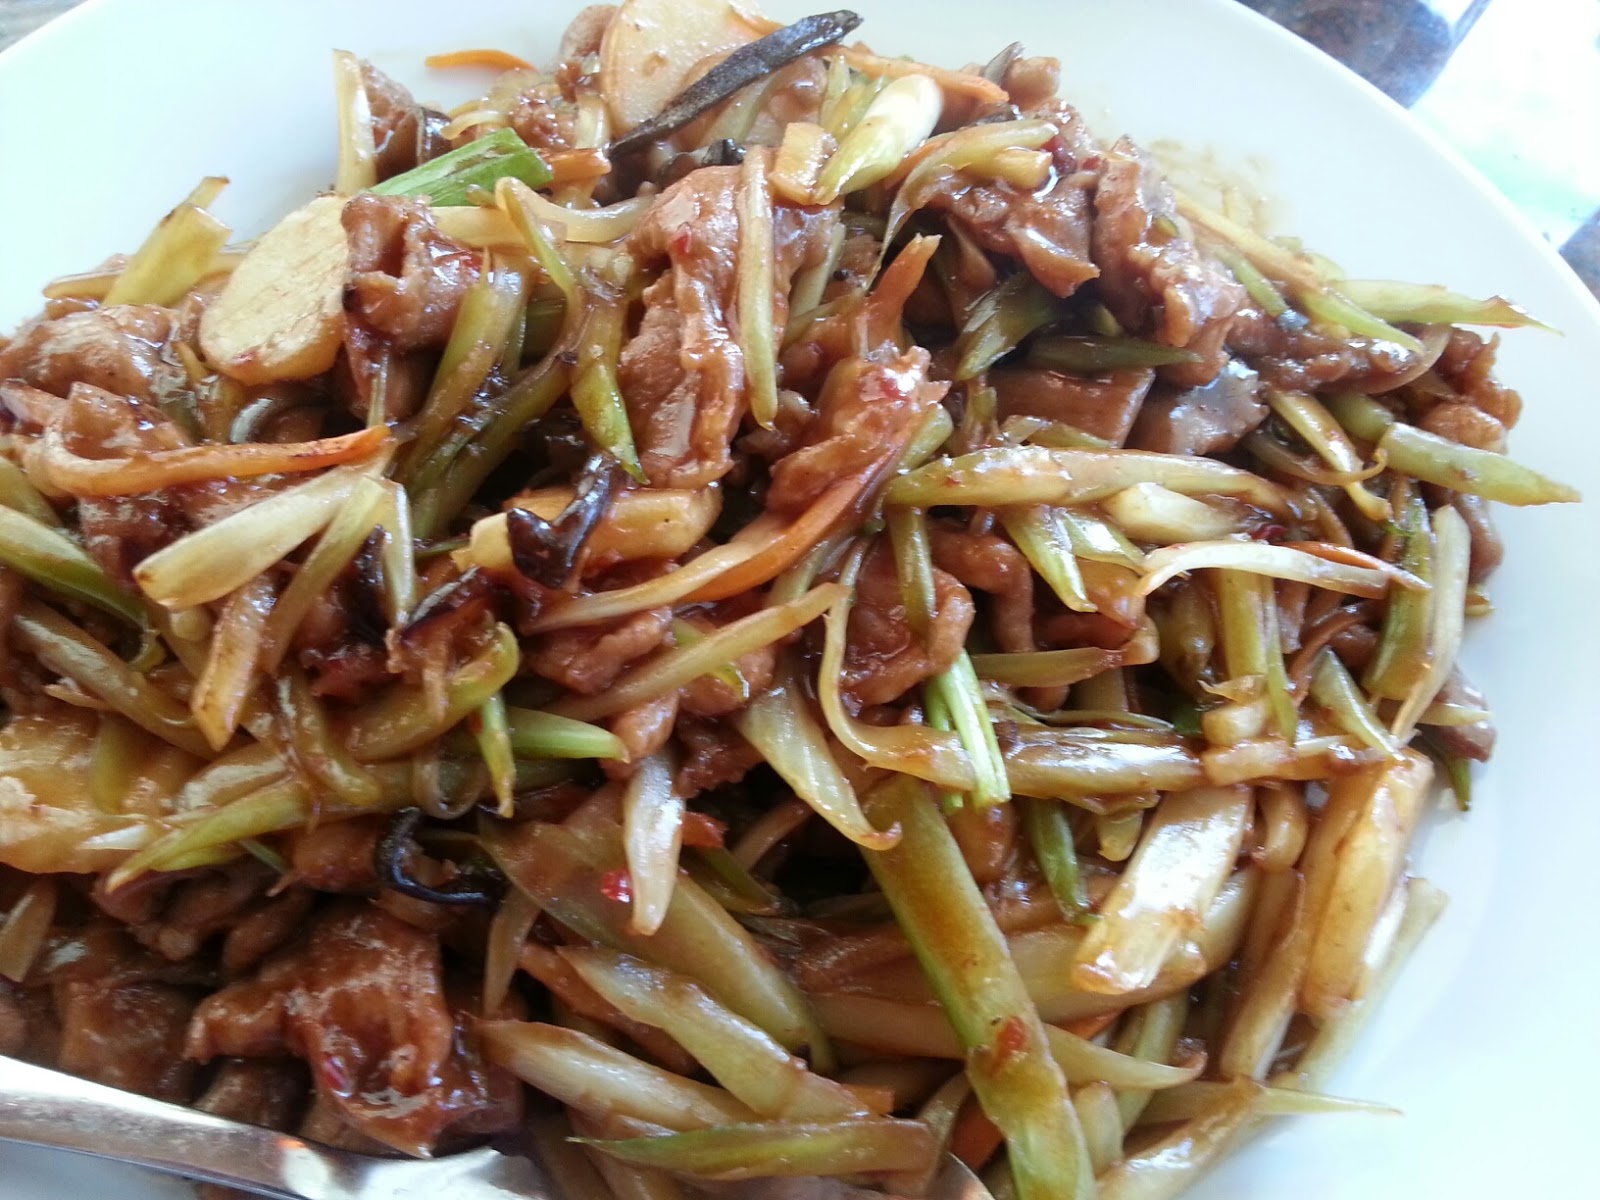
I ordered the Szechuan Pork, consisting of stir fried pork and vegetables in a sauce that was perfectly balanced with sweet and spicy notes. It tasted fresh and flavor exploded over my taste buds. The portion was so large, that I only ate half of it. I think it is nice having a second helping for the next day. 


Ginger Red, we will be coming back to you for sure. I can’t wait to try more!

Friday, September 6, 2013

Thai Chicken Pasta with Soba Noodles and Peanut Sauce

My husband took a recipe that he had found in the Food Network Magazine as a base and created a masterpiece. We both felt that this dish was better than Thai Chicken Pasta at The Cheesecake Factory. It is rich and creamy, with a mellow peanut butter taste that is supported by the hints of Asian seasonings.

I came home from the gym and he was working on making this. He asked me to try the sauce. It ended up being so good that after he was done making it, I got a spatula to lick the basin of the food processor. I felt like a kid licking the bowl of the brownie batter. Simply put, this peanut sauce is better than brownie batter.


Peanut Thai Chicken Pasta
Serves 6


Noodle Ingredients
¾ strong brewed green tea
1 cup creamy peanut butter
¼ cup soy sauce
¼ cup rice vinegar
5 Tbsp brown sugar
¼ peanut oil or macnut oil
2 Tbsp toasted sesame seeds with additional for garnish
1 tsp Sriracha
1 tsp toasted sesame oil
1 tsp ground ginger
2 ½ cloves of garlic, minced
2 Tbsp red chili pepper flakes
1 cup carrots, shredded
16 oz. Asian Soba Noodles

Chicken Ingredients
2 Tbsp sesame oil
2 Tbsp soy sauce
2 Tbsp oyster sauce
1 Tbsp granulated sugar
4 boneless, skinless chicken breasts, into cubes
1 lb sliced white cap mushrooms

Topping
½ cup dry roasted peanuts, chopped
1 cup fresh cilantro, chopped


Directions
1. In a large food processor or blender, combine tea, peanut butter, soy, vinegar, brown sugar, peanut oil, sesame seeds, sriracha, sesame oil, ginger, garlic, and chili flakes.  Process or blend ingredients until creamy.

2. Bring half a pot of water to a boil and cook the soba noodles for two minutes. Remove the noodles immediately, drain in a colander, and bathe in cold water until cool. Drain the cold water, then toss in peanut butter sauce mixture and add shredded carrots. Store noodles in fridge for up to an hour.

3. Mix sesame oil, soy sauce, oyster sauce, and sugar. Stir the mixture until the sugar is dissolved. Set aside.

4. Cook chicken until the pieces are white on all sides. Add mushrooms and cook until mushrooms soften. Add the above sauce and cook until sauce is rendered and almost gone.


5. To serve, place the noodles in the bottom layer of a bowl, then add the chicken and mushrooms. Top with cilantro and peanuts to taste.